Adding an existing user to another enterprise ID
If you have an existing user who needs access to more content in Control Center, you can add them to another enterprise ID rather than creating another username for them to remember. After adding them, be sure to check their permissions. You can turn permissions on or off for whole sections or you can turn on and off individual permissions within a section. You can also make a user a system administrator so they can access everything for that enterprise ID.
Users can have different permissions for each enterprise ID they have access to. For example, you can be a user on three enterprise IDs and a system administrator on a fourth enterprise ID. Once you add a user to an enterprise ID, you can then manage the accounts and permissions they have access to as you do all other users.
Adding an existing user to another enterprise ID also eliminates the need to sign in and out using different usernames to manage multiple enterprise IDs. By adding a user to multiple enterprise IDs, they can toggle between them to more easily manage their portal tasks.
To add an existing user to another enterprise ID:
- Sign in to Control Center. (Get help retrieving your username or password.)
- Click Admin, then click Users.
Control Center lists the users for your organization. Users with additional permissions or roles have icons next to their username: system administrators ().

- Click Add User.

- In the fields, type the usename and email address for the user you want to add, then click Verify & Add.
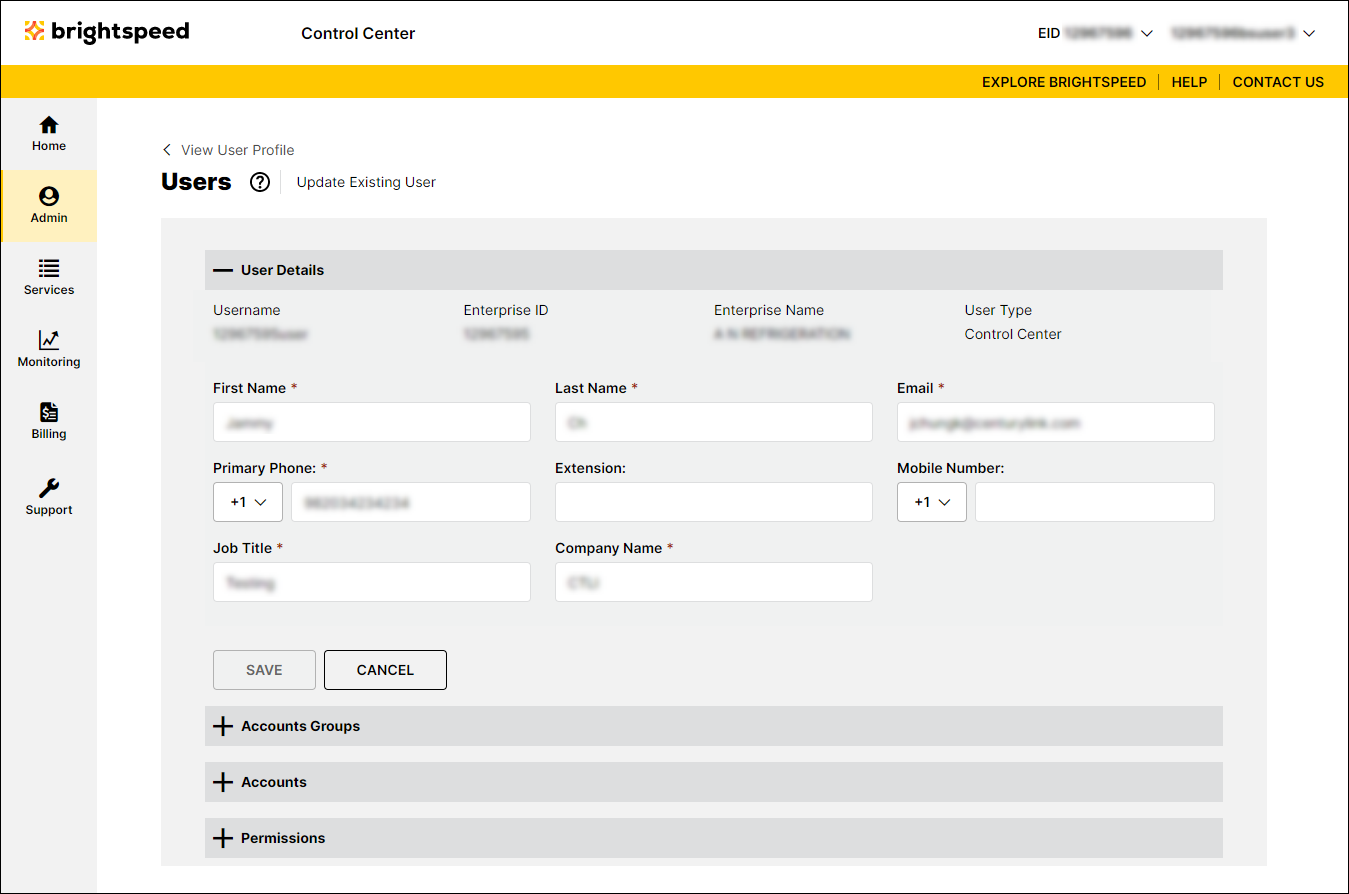
Control Center shows the profile for the user.

- Make any changes to the profile information for user (if needed). When you're done, click Save.
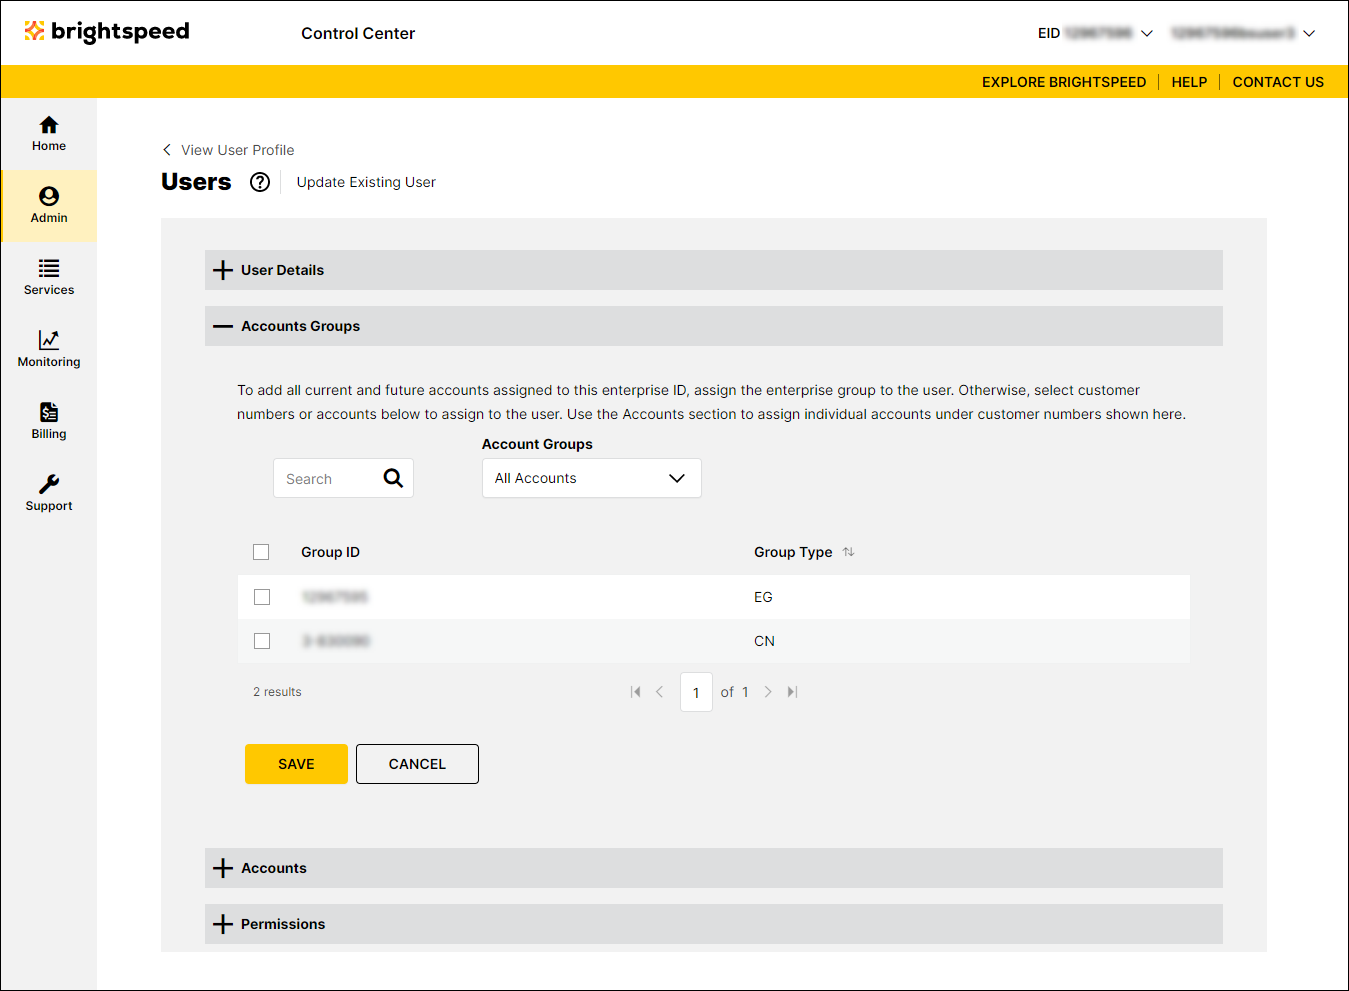
- Click the on the Account Groups section to expand the section.

- From the list, select the account groups you want to assign to the user:
- To assign an account group to the user, click the checkbox on the row for the account group.
- To assign all account groups to the user, click the checkbox on the gray bar above the column of checkboxes.
- To assign an account group to the user, click the checkbox on the row for the account group.
- When you're done assigning account groups, click Save.
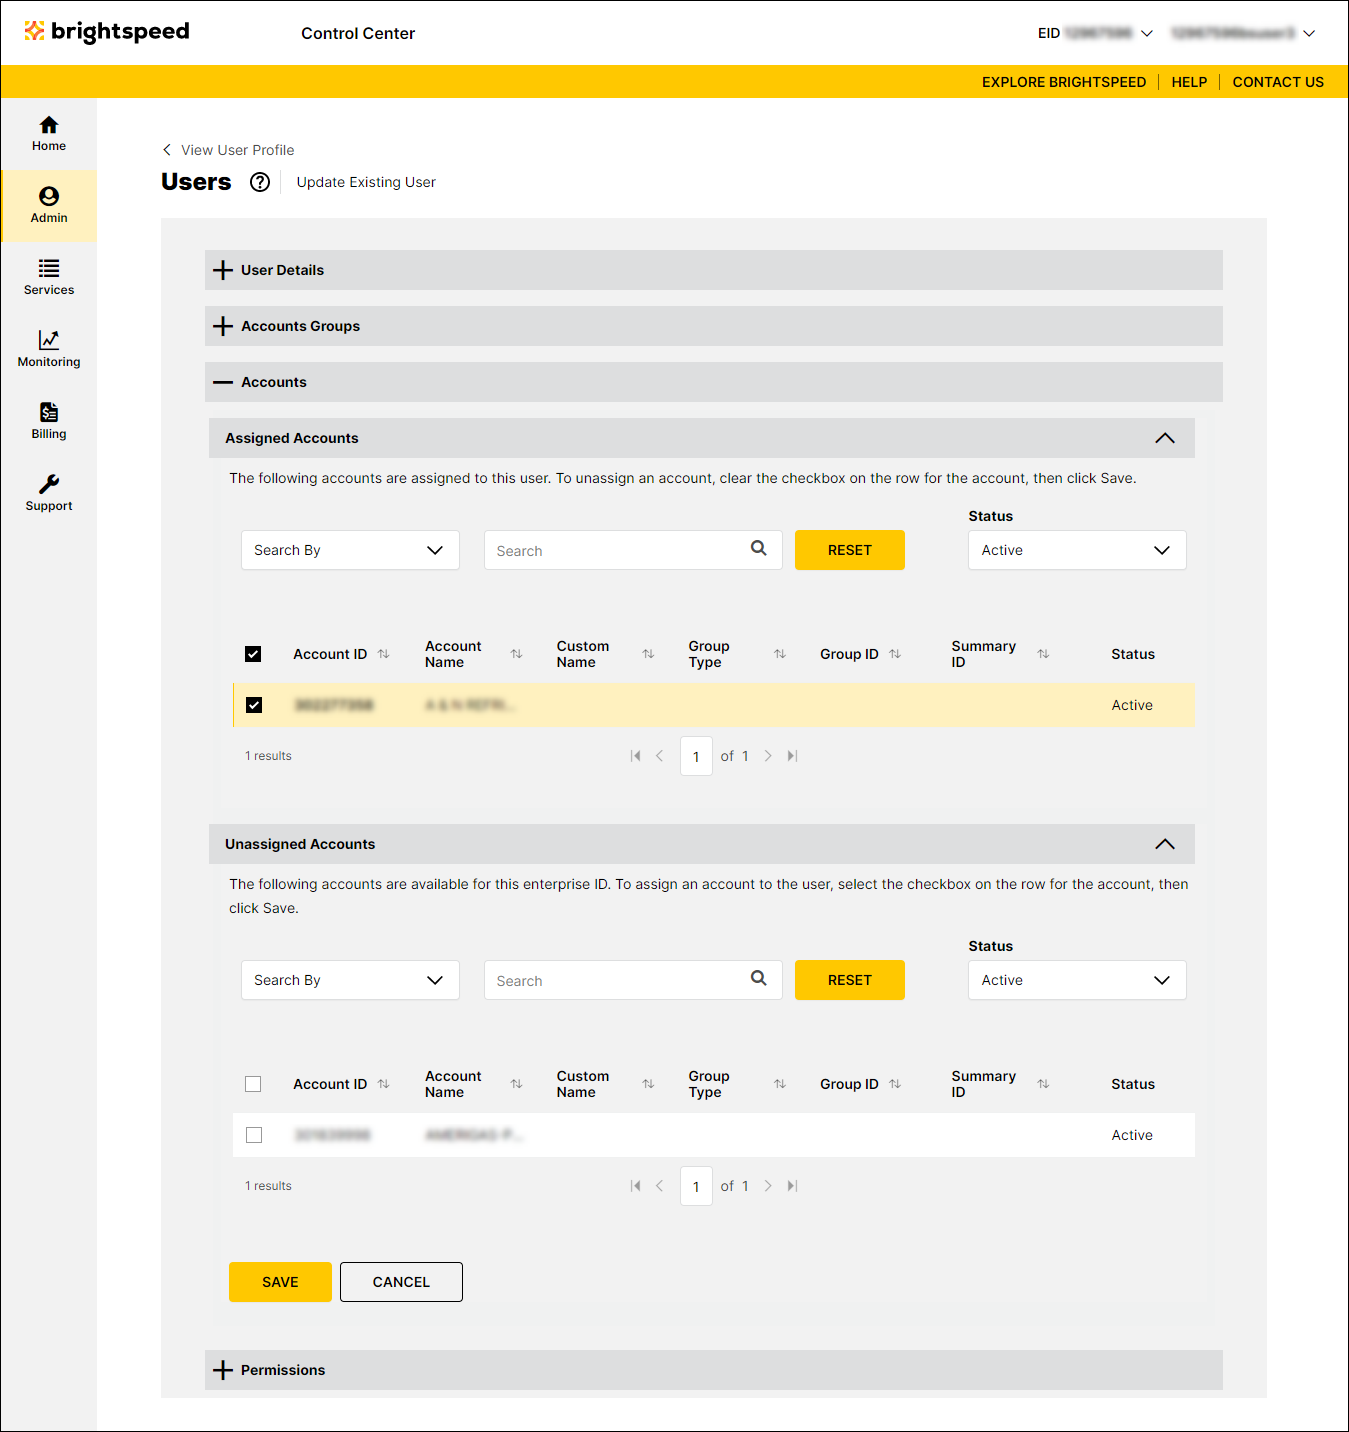
- Click the on the Accounts section to expand the section.
Control Center lists the accounts assigned to the user based on the account groups you selected.

- To add additional accounts, click on the right end of the Usassigned Accounts section to expand it, then click the checkbox next to the account(s) you want to add. (To add all unassigned accounts, click the checkbox on the gray bar above the column of checkboxes.)
- When you're done assigning accounts, click Save.
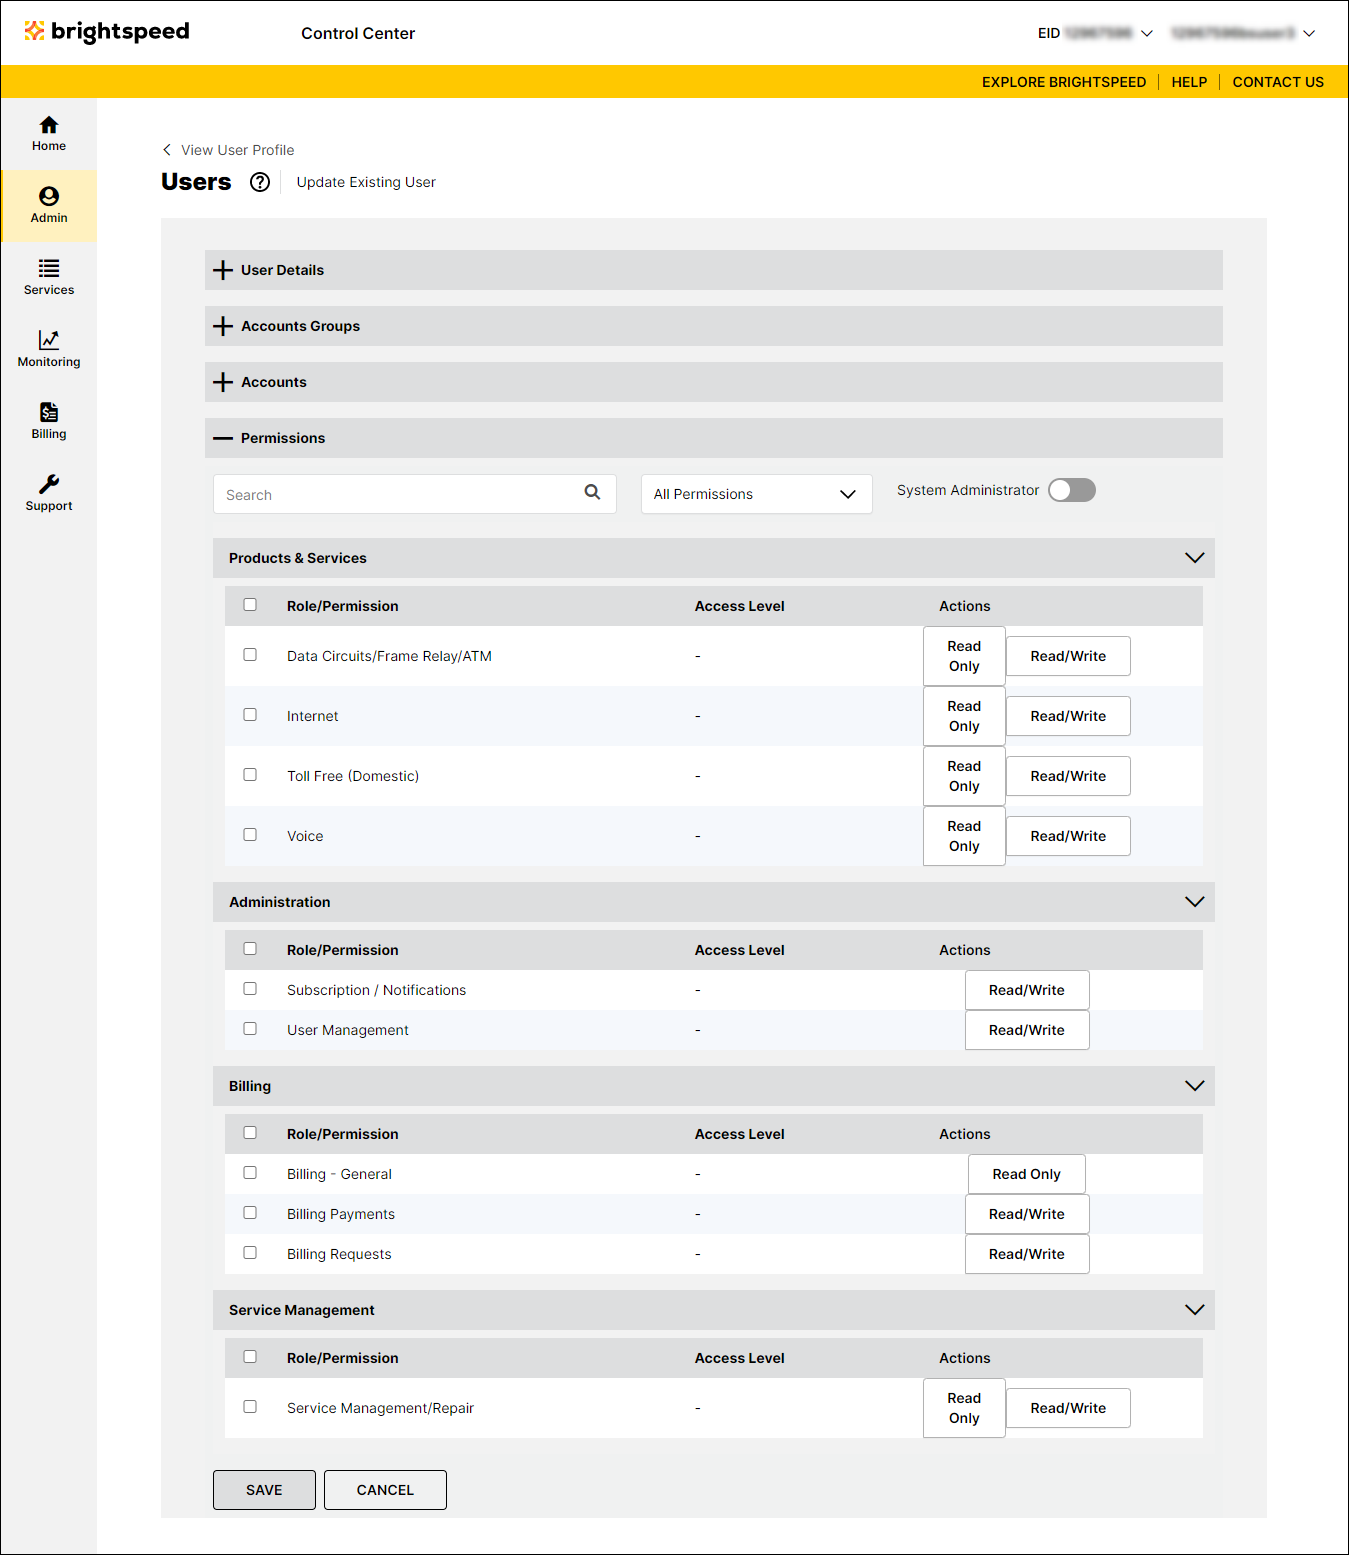
- Click the on the Permissions section to expand the section.

- Select the permissions you want to assign to the user:
- To add individual permissions, click the checkbox on the row for the permission.
- To add permissions for a whole section (e.g., Billing), click the checkbox on the gray bar for the section (above the column of checkboxes).
- To make the user a system administrator, click the System Administrator toggle to turn it on. (System administrators have access to all permissions.)
- To add individual permissions, click the checkbox on the row for the permission.
- When you're done, click Save.
Control Center adds the user to the enterprise ID and assigns the account groups, accounts, and permissions you selected. Control Center doesn't email the user to tell them about their new access, so make sure you let the user know they can now access this enterprise ID. The user can now switch between enterprise IDs and even set a default enterprise ID to view when they sign in.
Not quite right?
Try one of these popular searches:
Explore Control Center
